


.jpg)


Club de bridge de Saint-Cloud
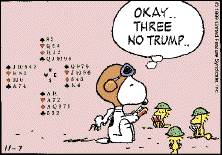
Snoopy aussi joue au bridge !
3 bis, rue des Avelines 92210 Saint-Cloud
0 788 319 885 Agenda des cours traités
Explorez le site ⟶ Signalisation en flanc ⟶Quiz — Fournir en 3ème ⟶
Quiz — Rubensohl et ses isotopes ⟶
Quiz — Spoutnik généralisé ⟶ 2SA fitté après intervention ⟶
Cumul des chances ⟶
Bien que les enchères aient lieu avant le début du jeu de la carte, il est préférable de bien comprendre les principes de base du jeu avant de s'y intéresser. Nous commencerons par vous asseoir à la place du déclarant. Votre objectif est de conclure le contrat — going with the odds whenever necessary. Je vous recommande vivement de disposer des cartes d'un jeu réel lors de l'étude de chaque diagramme de ce thème fondamental.
Comment les levées sont-elles gagnées ?
LEVÉES D'HONNEURS
Entamer un As procure un sentiment de sécurité et de bien-être. Si tous les autres joueurs fournissent la même couleur, vous devez remporter le pli, car votre As (la carte du dessus) ne peut pas être victime d'une carte supérieure de la même couleur. Même si un autre joueur défausse un As (ou toute autre carte), la levée vous est due car vous avez joué la carte la plus forte de la couleur. En vérité, la seule façon pour un adversaire de vous déjouer est de faire la levée (ce qu'il n'est autorisé à faire que s'il est incapable de fournir à la couleur, et en coupant “pardi”).
| LE MORT ♥ A |
||
| DÉCLARANT ♥ R |
| LE MORT ♥ A 7 |
||
| DÉCLARANT ♥ R 4 |
| LE MORT ♥ A 8 5 |
||
| DÉCLARANT ♥ R |
| LE MORT ♥ A D 6 3 |
||
| DÉCLARANT ♥ R V 2 |
CARTES PROMUES — AFFRANCHISSEMENT
Une deuxième façon de faire des plis est de faire tomber les cartes de rang supérieur afin de promouvoir vos cartes basses en cartes gagnantes.
| NORD (LE MORT) ♠ 6 4 3 | ||
| OUEST ♠ A 10 7 |
EST ♠ 9 8 5 2 |
|
| SUD (DÉCLARANT) ♠ R D V |
Vous (en Sud) avez remporté la levée précédente et êtes donc en main. Vous souhaitez faire quelques levées à Pique, mais l'As d'Ouest constitue un sérieux obstacle à votre projet. Vous ne pouvez pas gagner de levées à Pique immédiatement — il vous faudra rendre la main, mais vous pouvez vous assurer un avenir prospère en jouant le Roi de Pique. Ouest peut remporter la levée avec son As, mais votre Dame et votre Valet sont désormais promus ; ce sont maintenant les cartes à Piques les plus fortes — l'As et le Roi ont disparu. Lorsque vous reprenez la main (que ce soit dans votre main ou au mort), vous pouvez jouer Pique et encaisser deux plis.
LEVÉES DE LONGUEUR
Lorsque les adversaires n'ont pas d'atout (soit parce que le contrat est à Sans-atout, soit parce que tous leurs atouts ont été purgés lors des levées précédentes), vos cartes basses peuvent devenir maîtresses si elles sont présentes dans des couleurs longues. Puisqu'aucun atout nuisible ne peut apparaître, la carte la plus forte de la couleur jouée doit remporter la levée ; et si vous jouez une couleur que plus personne ne possède, cette levée va vous appartenir.
(A)
| NORD (LE MORT) ♥ 8 5 3 | ||
| OUEST ♥ A 6 2 |
EST ♥ 10 9 |
|
| SUD (DÉCLARANT) ♥ R D V 7 4 |
(B)
| LE MORT ♣ D 4 3 |
||
| DÉCLARANT ♣ A R 6 2 |
Dans l'exemple (a), il est impossible de prendre cinq levées, quelle que soit la répartition des cartes adverses. Si la couleur est partagée trois-deux, vous pouvez abandonner une levée (l'As) à un moment donné et vous retrouver avec quatre cartes gagnantes (deux levées d'honneurs et deux levées de longueur) ; si les trèfles sont partagés quatre-un, vous pouvez obtenir une levée de longueur en plus des deux levées d'honneurs en abandonnant deux plis à trèfle ; mais si vous tombez sur un partage cinq-zéro, vous ne pouvez pas faire grand chose.
Dans le cas (b), vous avez trois honneurs gagnants et pourrez remporter une quatrième levée à Trèfle si les Trèfles sont partagés trois-trois entre les mains de vos adversaires, car ils n'auront plus de trèfles au quatrième tour et ne pourront pas contester la victoire. En revanche, si un adversaire a quatre trèfles ou plus, vous ne pourrez remporter que les trois meilleures levées.
LES ATOUTS
Un atout est une possession précieuse car il surpasse toute carte d'une autre couleur. Si vous ne pouvez pas fournir à la couleur demandée, vous pouvez jouer un atout — vous coupez, si vous en avez un (bien que vous ne soyez pas obligé de le faire — couper est un droit, pas un devoir), et vous remporterez la levée si votre atout est le plus fort (ou le seul) joué.
| NORD (LE MORT) ♠ 10 8 5 3 | ||
| OUEST ♠ A R 6 4 |
EST ♠ D V 9 7 |
|
| SUD (DÉCLARANT) ♠ 2 |
| NORD (LE MORT) ♠ A 10 8 6 5 | ||
| OUEST ♠ R D V 7 |
EST ♠ 9 4 3 2 |
|
| SUD (DÉCLARANT) ♠ — |
Une fois de plus, les Cœurs sont les atouts et vous en avez plusieurs en main. Ouest joue le Roi de Pique, et vous pouvez remporter la levée de deux manières. Puisque vous n'avez plus de Pique (vous n'en avez plus), vous pouvez jouer le cinq du MORT et un atout de votre main. Alternativement, vous pouvez jouer l'As du MORT et défausser un Carreau ou un Trèfle de votre main. Il serait très extravagant de jouer à la fois l'As de Pique et un atout, car l'un ou l'autre de ces jeux à lui seul remportera la levée ; et vous pouvez défausser une carte sans valeur d'une autre couleur, qui pourrait autrement faire perdre une levée, sur l'As de Pique du MORT.
En résumé, l'objectif est d'exploiter au mieux les différentes méthodes pour remporter des levées – cartes maîtresses, cartes promues, levées de longueur établie et atouts (le cas échéant) – afin de remplir un contrat. Certaines méthodes seront utiles dans certaines situations, mais désastreuses dans d'autres ; jouer comme déclarant mettra à l'épreuve votre jugement au moment opportun pour utiliser chaque méthode, ainsi que la compréhension de sa nature.
IMPASSES
Les bons joueurs peuvent faire de grandes choses avec peu de moyens. Combien de levées pouvez-vous obtenir avec la main suivante ?
| LE MORT ♦ A D |
||
| DÉCLARANT ♦ 6 2 |
Si vous jouez l'As, les défenseurs joueront prudemment petit et conserveront le Roi pour capturer la Dame. Vous ne ferez qu'une seule levée à Carreau. Jouer la Dame et le mort ne servira à rien car chaque défenseur peut remporter la levée avec le Roi. Supposons maintenant que vous jouiez une petite carte de votre propre main vers la fourchette As-Dame, Ouest fournit petit et que vous pariez sur la Dame du mort. Cette manœuvre n'a qu'une chance sur deux de réussir mais ne pas tener l'impasse, c'est zéro chance. Après tout c'est comme au Bac. Essayer de faire un pli avec une carte non maîtresse. Que voulez-vous, quand on a une fourchette on s'en sert, et quand on n'en a pas j'imagine qu'on se sert avec les doigts?
Double impasse
Il existe certaines situations où un déclarant en quête de levées peut s'en sortir face à plusieurs cartes. Par exemple :
| LE MORT ♦ A D 10 |
||
| DÉCLARANT ♦ 6 2 |
Dans l'exemple ci-dessus, vous pouvez remporter trois levées si Est possède le Roi et le Valet en jouant petit depuis le mort et en passant le Dix, puis en répétant la manœuvre avec la Dame. Les deux jeux ne sont pas interchangeables ; si la Dame est jouée en premier, Est conservera le Roi-Valet contre l'As-Dix et vous ne remporterez que deux levées.
| LE MORT ♦ 6 4 2 |
||
| DÉCLARANT ♦ A V 10 |
Bille en tête
Supposons que vous ayez besoin de quatre levées avec les cartes suivantes (il y a pire):| LE MORT ♦ A R D 10 |
||
| DÉCLARANT ♦ 5 4 3 2 |
Vous êtes en main et vous avez deux choix. Vous pouvez encaisser l'As, le Roi et la Dame, en espérant voir tomber le Valet (valorisant ainsi le dix du nort) ; ou vous pouvez jouer l'impasse vers le Dix dès la première levée et espérer que Ouest détienne le Valet. La bonne méthode consiste à jouer “bille en tête”. Faire l'impasse est préférable si Ouest a quatre ou cinq Carreaux par le Valet ; jouer pour laisser tomber sauvera la situation si Est a un, deux ou trois carreaux, Valet compris. (Dans toutes les autres mains, les deux stratégies fonctionnent aussi bien ou moins bien.) Tirer en tête est plus souvent gagnant et constitue donc la meilleure stratégie.
Pour vous éviter d'avoir à vous débattre avec de nombreux calculs mathématiques à chaque fois que vous êtes confronté à une telle décision, voici un tableau utile qui indique quand il convient de tenter une impasse et quand vous devez tirer en tête :
| Teneur | Nombre de cartes (DÉCLARANT + LE MORT) | Toute chose étant égale, votre meilleure ligne: |
|---|---|---|
| A D | Onze | Tirez l'As |
| Dix ou moins | Impasse (Dame) | |
| A R V | Neuf ou plus | Tirez As et Roi |
| Huit ou moins | Impasse (Valet)* | |
| A R D 10 | Sept ou plus | Bille en tête |
| Six ou moins | Impasse (Dix)* | |
| A R D V 9 | Peu importe | Bille en tête |
*Commencez par encaisser autant de gros honneurs que vous pouvez vous le permettre tout en vous laissant suffisamment de cartes (et d'entrées) pour tenter l'impasse.
Assurez-vous de bien comprendre la phrase « toutes choses étant égales par ailleurs » — Ceteris paribus. Les enchères ou le jeu contiennent souvent des indices indiquant que le choix normal doit être rejeté — lorsqu'il y a une intervention ou après qu'un opposant ait produit une enchère de barrage — autrement dit celui qui joue à l'aveugle est sourd! En l'absence de telles informations, la meilleure solution consiste à suivre le tableau ci-dessus. Au bridge on ne dit jamais “jamais”, on ne dit jamais “toujours”.
LE FLANC JOUE UNE COULEUR
Parfois les défenseurs prennent la main, ce qui vous donne l'occasion de tenter une impasse — flan(c) caramel ou flanc tabou. Par exemple :
(A)
| LE MORT ♠ D 6 |
||
| DÉCLARANT ♠ A 4 3 |
(B)
| LE MORT ♠ D 6 4 |
||
| DÉCLARANT ♠ A 7 2 |
(C)
| LE MORT ♠ D 10 3 |
||
| DÉCLARANT ♠ A 4 2 |
(D)
| LE MORT ♠ D 10 3 |
||
| DÉCLARANT ♠ A 4 2 |
(E)
| LE MORT ♠ A D 4 |
||
| DÉCLARANT ♠ 10 6 5 |
Dans chaque cas, Ouest (adversaire de gauche) en main joue un petit Pique. Dans l'exemple (a), passez la Dame du mort ; si Ouest a le Roi, vous remportez la levée. À moins que la Dame ne soit jouée maintenant, elle ne remportera jamais de levée. Si vous jouez le six, Est chassera votre As en fournissant la bonne pointure (comme le neuf ou le Valet) et la Dame, seule et sans défense au mort sera victime du Roi au tour suivant.
Dans le cas (b), vous pouvez toutefois vous permettre de jouer petit au mort (à moins d'être pressé de faire deux levées), de prendre la carte jouée par Est et de jouer vers la Dame plus tard. Il est avantageux pour vous de conserver la Dame au mort, car si Est a le Roi et qu'il prenne la main il ne pourra jouer Pique sans permettre à la Dame de faire le pli.
Dans le cas (c), vous devriez également appeler petit au mort. Cela assure deux levées dans la couleur.
Dans l'exemple (d), misez sur le dix du mort. S'il force le roi, votre Dame est promue ; si Est couvre le Dix avec le Valet, vous pouvez envisager de faire la Dame plus tard.
Dans la situation (e), votre seule chance de remporter les trois levées est d'appeler petit au mort. Si Ouest a le Roi et le Valet, votre Dix fera la levée et vous pourrez ensuite envisager l'impasse contre le Roi. Fournir petit au mort est également avantageux si Ouest a le Valet et Est le Roi, car Est doit jouer son Roi pour remporter cette levée, promouvant ainsi la dame du mort. Si Ouest a le Roi et Est le Valet, aucun mal n'est fait car vous pourrez toujours tenter l'impasse plus tard.
Surtout, ne soyez pas surpris si les défenseurs prennent la main, une situation que vous pouvez exploiter à votre avantage. Ils ne voient pas les mains de l'autre et pourraient bien prendre de mauvaises décisions en retour — switch. Mais ne risquez pas votre contrat en cédant à la cupidité et en envisageant une impasse inutile ! Plus généralement, si vous pouvez gagner un contrat sans tenter une impasse, ne la faites pas.
EXPASSE
Le pouvoir de l'atout peut servir à créer une position de compromis là où elle n'existerait pas normalement. Par exemple :(A)
| NORD (LE MORT) ♠ A D V 10 |
||
| SUD (DÉCLARANT) ♠ 4 |
(B)
| NORD (LE MORT) ♠ R D V |
||
| SUD (DÉCLARANT) ♠ — |
Les Cœurs sont les atouts, et vous disposez d'une réserve suffisante. Dans l'exemple (a), vous pouvez effectuer une impasse ordinaire en jouant le quatre de Pique et en insérant le dix du mort. Alternativement, vous pouvez jouer le quatre de Pique pour l'As et présenter la Dame, en prévoyant de défausser si Est fournit petit mais de couper si Est fournit le roi (Expasse). Ainsi, vous pouvez jouer n'importe quel adversaire pour le roi.
IMPASSE IMMATÉRIELLE
Les meilleurs joueurs ne répugnent pas à avouer qu'au bridge on ne cesse d'apprendre. Au bridge, soit on gagne, soit on apprend! Par exemple :(A)
| NORD (LE MORT) ♠ 4 3 2 ♦ A 10 2 |
||
| SUD (DÉCLARANT) ♠ A D V ♦ R D 4 |
En Sud vous devez emporter toutes les levées, autrement dit vous devez réussir en répétant l'impasse à Pique contre le Roi en Est. Vous êtes en main et vous ne disposer que d'une seule entrée au mort pour tenter deux fois l'impasse Pique, l'♦ As.
La solution? Jouez Carreau en appelant le ♦ 10 du mort! Si le ♦ 10 fait la levée vous aurez trouvé votre première communication, l'♦ As étant la seconde. Impasse Pique et ♦ Roi pour l'♦ As du mort et impasse Pique. Bien joué n'est-ce pas? C'est une impasse immatérielle en ce sens que sa réussite ne vous raporte aucune levée supplémentaire à Carreau — vous détenez déjà As-Roi-Dame. Imaginez maintenant que le flanc gauche en Ouest intercale son ♦ Valet, le ♦ 10 ne peut plus servir de communication...
ENTRÉES — NAVIGUER
Vous n'êtes pas autorisé à jouer allègrement depuis votre main ou celle du mort comme bon vous semble; c'est bien la main qui vient de remporter une levée qui doit jouer pour la suivante. Ainsi, si une impasse nécessite de manœuvrer depuis le mort et que vous venez de remporter la dernière levée en main, vous devez joindre le mort (par une carte d'une couleur différente afin que le mort prenne la main) avant de tenter l'impasse. Par exemple :
Dans le cas (b) par contre, vous n'avez qu'un seul choix : espérer qu'EST ait l'As. Entamer le roi depuis le mort ; coupez si Est fournit l'As et défaussez si Est joue petit. Dans le premier exemple, l'impasse par la coupe produira trois levées à Pique si la première impasse marche et que vous continuiez avec le Valet (et le Dix) ; dans le second cas, vous ferez deux levées à pique si l'As est là où vous le souhaitez (en Est).
| NORD (LE MORT) ♠ A ♥ 3 2 |
||
| OUEST ♠ 2 ♥ 6 5 |
EST ♠ 3 ♥ R 4 | |
| SUD (DÉCLARANT) ♠ 4 ♥ A D |
Vous souhaitez tenter l'impasse à Cœur, mais vous venez de remportr la levée précédente en main. Vous commencez donc par joindre le mort en jouant Pique pour l'As. Maintenant que le mort a la main, vous pouvez présenter le ♥2 pour tenter l'impasse contre le Roi d'Est.
| LE MORT ♠ A 4 ♦ 6 3 |
||
| OUEST ♠ R 7 ♦ 8 4 |
EST ♠ 5 3 ♦ A 10 | |
| DÉCLARANT ♠ D V ♦ R 2 |
Le mort a la main et vous pouvez tenter les deux impasses si vous procédez correctement. La première en présentant un petit Carreau du mort ; supposons qu'Est décide de foutnir le dix. Vous passez le roi ; s'il emporte le pli, vous jourez la ♠ — une impasse presque forçante contre Ouest. Ainsi, une impasse fournit la communication nécessaire pour tenter l'autre impasse — non, cela ne signifie pas que vous êtes en train de “mouliner vos adversaires”.
| LE MORT ♠ 3 ♥ — ♦ 6 4 2 |
||
| OUEST ♠ — ♥ 7 4 ♦ 5 3 |
EST ♠ — ♥ 6 ♦ D 8 7 | |
| DÉCLARANT ♠ — ♥ 2 ♦ A R V |
L'atout est Pique. Vous aimeriez tenter une impasse à Carreau, mais vous êtes en main. Encaissez donc l'♦ As en coup de sonde (si Ouest possède ♦ Dame sèche), jouez le ♥ 2 coupé au mort avec le ♠ 3. Depuis le mort les défenseurs vont subire leur sort habituel lorsqu'un petit Carreau prendra en impasse la ♦ Dame d'Est.
Il arrive fréquemment que vous ayez besoin de davantage d'entrées dans une main que dans l'autre, et ce besoin peut souvent être satisfait par une gestion prudente de “vos actifs” bien combinés :
(A)
| LE MORT ♠ A D 3 |
||
| DÉCLARANT ♠ R V 2 |
(B)
| LE MORT ♥ R D V 9 8 7 |
||
| DÉCLARANT ♥ 10 |
(C)
| LE MORT ♥ 7 6 ♦ A R D 3 ♣ 5 4 3 2 |
||
| DÉCLARANT ♥ A D ♦ V 10 9 2 ♣ A D V 10 |
(D)
| LE MORT ♦ A R 7 4 3 |
||
| DÉCLARANT ♦ 6 5 2 |
Dans l'exemple (a), vous êtes sûr de trois levées, mais vous pouvez prévoir une entrée supplémentaire là où elle est le plus nécessaire. Si le mort a besoin d'entrées, jouez un petit Pique pour la Dame ; l'As assuera une seconde rentrée. Si, en revanche, c'est votre main qui nécessite des entrées, jouez le ♠ 3 du mort pour votre Valet, puis surprener la Dame avec le Roi pour produire la deuxième communication.
Dans la situation (b), vous jouez à Sans-atout et souhaitiez faire un grand nombre de levées à Cœur ; vous êtes en main à l'entame. Puisque toutes les levées à Cœur sont équivalentes, il est tentant jouer le ♥ 10 puis de rejouer Cœur du mort. Si, en revanche, un adversaire refuse de prendre cette levée — on dit qu'il ducke (esquive), vous aurez besoin d'utiliser une communication supplémentaire du mort afin d'insister à Cœur (et de faire tomber l'As chez l'adversaire), et il vous faudra encore un entrée au mor pour défiler les Cœurs affranchis. Une meilleure manœuvre consiste à surprendre le ♥ 10 avec le Roi. Maintenant, même si le Roi est emporte la levée, vous poursuivrez à Cœur ; lorsque les adversaires encaisseront leur ♥ As, le mort n'aura besoin que d'une unique communication pour défiler la couleur ainsi établie. À la carte contrôlez le plus possible ce que vous pouvez contrôler!
Dans l'exemple (c), vous disposez de trois communications sûres au mort et vous voulez en créer une quatrième dans la perspective de manœuvrer certaines couleurs À trois impasses répétées à Trèfle et une impasse à Cœur, donc quatre impasses. Une condition que les Carreaux adverses soient partagés trois et deux. Surprendre le ♦ Valet de l'As assurer la première entrée ; plus tard, faites la même chose avec le ♦ 10 pris du Roi. Si les deux adversaires fournissent c'est qu'il ne reste qu'un seul Carreau dehors ; consommez le ♦ 9 avec la ♦ Dame pour fournir la troisième entrée. Vous disposez d'un quatrième communication en surprenant le ♦ 2 avec le ♦ 3 du mort. Si un adversaire défausse (on le voit) au premier ou au deuxième tour de Carreau, abandonnez ce plan puisqu'un adversaire aura au moins quatre Carreaux.
Dans le dernier cas (d), supposons que le mort ne dispose d'aucune communication dans une autre couleur et que vous avez besoin de quatre levées à Carreau. Si les Carreaux ennemis sont partagés en trois et deux, vous réussirez en jouant très prudemment. Supposons que vous commettiez l'erreur d'encaisser l'As et le Roi puis insistiez avec un troisième tour à Carreau, forcément emporté par les adversaires. Les deux derniers Carreau du mort sont désormais titularisés, mais il n'y a plus d'entrée au mort pour les encaisser. La seule entrée possible est dans la couleur Carreau elle-même, et vous devez la préserver jusqu'à ce que les cartes basses aient été établies. Par conséquent, jouez d’abord un petit Carreau des deux mains — coup à blanc, en concédant immédiatement votre perdante certaine. Lorsque vous reprenez plus tard l'avantage, encaissez l'As et le Roi de carreau. Comme auparavant, les adversaires ont gagné un pli et la couleur est établie, avec une différence essentielle : la main est maintenant au mort, et les bons diamants peuvent être joués pour faire les deux plis de mieux.
DÉBLOCAGE
Parfois, vos entrées nécessiteront une bonne observation de vos cartes :
| LE MORT ♦ A R 6 5 4 |
||
| DÉCLARANT ♦ D 9 8 2 |
Vous êtes en main à un contrat à Sans-atout. Vous encaissez la ♦ Dame tandis que les deux adversaires emboîtent le pas. C'est une bonne nouvelle car cela signifie qu'aucun adversaire ne détient quatre cartes à Carreaux. Vous pouvez donc réaliser cinq levées dans la couleur. Ainsi dit les choses semblent simples à cet instant mais attention ! Si vous jouez maintenant le ♦ 2 pour la ♦ Roi du mort et qu'un adversaire défausse, vous aurez des ennuis. Votre prochain tour sera l'♦ As, et au quatrième tour de Carreau vos ♦ 9 vous gênera en remportant la levées. Le cinquième Carreau du mort sera désormais inutile à moins que le mort n'ait une entrée latérale? Vous êtes bloqué dans votre main, incapable de faire le cinquième Carreau escompté.
Pour surmonter cette déconvenue, présenter le ♦ 9 pris du ♦ Roi au mort après avoir encaissé la ♦ Dame, et faites en autant avec le ♦ 8 pris de l'♦ As. Le blocage est désormais levé et vous pouvez encaisser les deux plis à Carreau au mort.
Une gestion minutieuse des communications est l’une des caractéristiques d'un déclarant compétent. Il n'est pas simple de planifier cette situation à l'avance — surtout en flanc!, mais avec la pratique vous saurez du mort ou du déclarant qui doit être en main pour encaisser les levées espérées. Au début, vous ne réussirez pas toujours ; mais plus vous jouez, mieux vous réussirez !
LA MÉMOIRE DES CARTES
Il est important de se souvenir des cartes jouées puisqu'il est interdit de consulter une levée précédente si votre camp a joué la suivante. De nombreux joueurs débutants se plaignent : « Comment apprendre à jouer au bridge ? Je n'arrive pas à suivre les cartes ! »
Attention aux techniques mnémotechniques. Elles peuvent aider des débutants mais aucun champion ne les utilisent. Pourquoi? Parce que le bridge ne s'apprend pas vraiment, il se comprend!.

Mémoriser toutes les cartes jouées ne présente pas grand intérêt. Face au mort donnez-vous un temps de réflexion pour élaborer un plan de jeu. Combien de levées maîtresses, combien manque-t-il de plis, comment décompter les cartes sans trop d'effort? Parce que le bridge est un jeu de fautes, apprenez à observer les cartes et les distributions qui vous vous aider. Si une carte vous échappe vous risquez de vous prendre les pieds dans le tapis! Vous découvrirez qu'une basse carte comme un 9 ou un 8 aura un rôle essentiel. Portez votre attention sur celles que vous n'a pas encore vues. C'est plus simple puisqu'au fur et à mesure il y en a de moins en moins. La mémoire au bridge est sélective. Oubliez ce qui ne sert plus pour porter votre attention sur ce que l'on cherche. Ne passez pas en revue toutes les cartes jouées, utilisez plutôt des partitions. Compter sans effort ⟶
Lorsqu'un joueur relève sa main, il compte ses cartes face cachée. Certains comptent leurs cartes une par une comme des billets de banque — au moins douze gestes pour treize cartes. Les joueurs expérimentés en écartent trois, puis trois, puis trois. S'il en reste quatre c'est qu'il en détient bien treize en tout — 4=3=3=3 font 13! Combien de gestes? Seulement trois!
Autre exemple en cours de jeu. Les enchères — peu importe, ont montré que le déclarant possède cinq cartes à Pique et quatre à Cœur. Votre partenaire entame ♦ As-Roi tandis que le déclarant coupe le second tour à Carreau — il a bien un singleton à Carreau? La distribution des cartes du déclarant est donc 5♠=4♥=3♣=1♦, il a donc trois cartes à Trèfle. Pourtant personne n'a encore touché aux Trèfles!
Autre exemple classique: imaginons que vous possédiez — vous et le mort, huit cartes à l'atout. Il en manque donc cinq (13-8=5), c'est la première chose à observer. Vous encaissez l'As et tout le monde fournit. Il n'y a donc plus que trois atouts dehors. Vous pouvez oublier qu'il y en avait cinq dehors au tout début. Maintenant le déclarant encaisse le Roi d'atout tandis qu'un joueur en flanc défausse. Les deux derniers atouts sont donc dans l'autre main de la défense. Voilà l'état des lieux.
Résumé: Introduction au jeu du déclarant
I. Comment fait-on des plis?
1. Cartes supérieures (Top card) : vous jouez la ou les cartes les plus fortes de la couleur.
2. Cartes promues (affranchissement d'honneurs) : vous éliminez les cartes de rang supérieur de la couleur, promouvant ainsi la vôtre au rang supérieur.
3. Affranchissement de longueur : vous épuisez les cartes de la couleur adverse, et vos cartes basses deviennent alors gagnantes. Vous avez au moins sept cartes dans de telles couleurs. Voilà pourquoi on octroie un point de longueur à la cinquième carte d'une couleur et même deux au neuvième atout du camp
4. Levée de coupe, surtout celle de la main courte.
II. Impasses
1. A D opposés à 3 2: jouez petit vers la Dame.
2. R 4 opposés à 3 2: jouez petit vers le Roi.
3. D V 2 face à 5 4 3: jouez deux fois vers les honneurs groupés (respectivement Dame et Valet).
4. R D 2 face à 5 4 3: jouez deux fois vers les honneurs groupés (respectivement Roi et Dame).
5. A 3 2 en face de R V 4: encaissez l'As puis impasse vers le Roi-Valet.
6. D V en face de A 4: présentez la Dame.
7. D 3 2 en face de A 5 4: encaissez l'As avant de jouer vers la Dame.
8. A D 10 opposés à 4 3 2: jouez petit pour le Dix; ensuite impasse vers la Dame.
9. A J 10 opposés à 4 3 2: en premier, impasse vers le Dix; ensuite impasse vers le Valet.
10. R D V en face d'une chicane (contrat à l'atout): présentez le Roi; coupez si l'As apparaît, sinon défaussez (expasse).
11. A D V en face du 2 (contrat à l'atout): soit petit pour la Dame (impasse classique) or play the ace and lead the queen for a ruffing finesse.
12. Si une couleur est jouée par l'adversaire:
| Ouest joue | NORD (LE MORT) | SUD (DÉCLARANT) | Votre jeu |
|---|---|---|---|
| ♠ 2 | A. ♠ D 3 | ♠ A 5 4 | Dame du mort |
| B. ♠ D 4 3 | ♠ A 6 5 | Petit du mort | |
| C. ♠ A 5 | ♠ D 4 3 | Petit du mort | |
| D. ♠ D 10 3 | ♠ A 5 4 | 10 du mort | |
| E. ♠ A D 3 | ♠ 10 5 4 | Petit du mort |
| Ouest joue | NORD (LE MORT) | SUD (DÉCLARANT) | Votre jeu |
|---|---|---|---|
| ♠ 2 | A. ♠ D 3 | ♠ A 5 4 | Dame du mort |
| B. ♠ D 4 3 | ♠ A 6 5 | Petit du mort | |
| C. ♠ A 5 | ♠ D 4 3 | Petit du mort | |
| D. ♠ D 10 3 | ♠ A 5 4 | 10 du mort | |
| E. ♠ A D 3 | ♠ 10 5 4 | Petit du mort |
13. Tirez en tête (a) A D et onze cartes; (b) A R V et neuf cartes ou plus; (c) A R D 10 et sept cartes ou plus; (d) A R D V 9 (toujours).
07 88 31 98 85
, les donnes que nous ne chutons pas nous rendent plus forts!Le bridge serait-il un jeu Nietezschéen ?
- Vous êtes débutant ou néophyte?
- Une bataile à quatre ou à deux contre deux?
- Qui emporte une levée?
- Défausser ou couper?
- Charger ou pas?
- Engager son camp
- To bid or not to bid?
- Le mort au bridge
- Résumé
- Dérision
- Table de décision
- Repérage et levées maîtresse
- Communications
- Jouer à l'atout
- Palier d'enchère inutile
- Création de levées à l'atout
- Découverte d'un atout majeur
- Soutien à saut en majeure
- Enchères à quatre
- Ouverture mineure
- Bibliothèque JF2-13 à JF3-24
- Le bridge français
- Jeu à Sans-atout A.01-12
- Jeu à Sans-atout A.13-24
- Spoutnik & En gagnantes B.01-12
- En gagnantes B.13-24
- Certitude du fit & déf. urgente C.01-12
- 2 fort, coupe côté court et impasse C.13-24
- Techniques d'impasse D.01-12
- Atouts en flanc & fournir D.13-24
- Le camp qui n'a pas ouvert joue E.01-12
- Stayman et impasses E.13-24
- Barrage et réflexion en flanc F.01-12
- Dialogues délicats F.13-24
- Dialogues divers G.01-12
- Réflexion en flanc G.13-24
- Création de levées H.01-12
- Réflexion en flanc H.13-24
- Le bridge français
- Les fondamentaux
- Déclarer un contrat
- Évaluation d'une main
- Jouer à l'atout
- Autres ouvertures
- Création de levées — impasses
- Enchères à quatre
- Situations compétitives
- Enchères à quatre
- Contre d'appel
- Enchères libres
- Stayman ou Texas
- Redemandes
- Ouvertures fortes
- 1♠ — 2♥
- Intervention à 1♠
- Le contre d'appel
- Quatrième couleur
- Troisième couleur
- Le Roudi — feedback à 2♣
- Soutiens modernes 1
- Soutiens modernes 2
- Fournir en 3ème
- Fournir en 2ème
- Promotion, défausse...
- Mains bicolores
- Enchères de chelem
- Révision 1 & 2
- Flanc à SA
- Combattre un barrage (...)
- Convention Drury (...quiz)
- Soutiens modernes
- Le Landy
- Le coup à blanc
- Rebids délicats en min.
- Enchères d'essai
- Suite establishement
- Théorie du singleton
- LoTT
- Flanc dangereux
- Défense côté partenaire
- Après un 2-sur-1
- Cachalot
- Défense contre le 2 faible
- Défense contre le SA
- Reverse Drury
- Compétitive après 1SA Rubenshol
- Les contre Spoutnik
- Défausses urgentes
- 2SA fitté après intervention
- Contre punitif
- Signalisation à SA
- Signalisation à la couleur
- Spoutnik généralisé
- Intervention. Pourquoi?
- Coupe côté court
Ci-après des thèmes manquent!!
Thèmes
- Jeux d'affranchissement 1.01-12
- Jeux d'affranchissement 1.13-24
- Plan de jeu et jeu de coupe 1.01-12
- Plan de jeu et jeu de coupe 1.13-24
- Fit majeurs : essai, contrôles et BW 1.01-12
- Fit majeurs : essai, contrôles et BW 1.13-24
- Sur 1SA : Stayman, Texas et Splinter 4.01-12
- Sur 1SA : Stayman, Texas et Splinter 4.13-24
- Enchères compétitives 5.01-12
- Enchères compétitives 5.13-24
- Tournoi pour tous 6.01-12
- Tournoi pour tous 6.13-24
- Flanc à Sans-atout 7.01-12
- Flanc à Sans-atout 7.13-24
- Flanc à Sans-atout 8.01-12
- Flanc à Sans-atout 8.13-24
- 2ème rebid du répondant 9.01-12
- 2ème rebid du répondant 9.13-24
progression (suite)
- Feedback du répondant 10.01-12
- Feedback du répondant C1-C4-10.12
- Feedback du répondant 10.13-24
- Enchères à Quatre 11.01-12
- Enchères à Quatre 11.13-24
- Tournoi pour tous 12.01-12
- Tournoi pour tous 12.13-24
- Couleur à affranchir 13.01-12
- Couleur à affranchir 13.13-24
- Maniement de couleur 14.01-12
- Maniement de couleur 14.01-12
- Développement dur 2SA 15.01-12
- Développement dur 2SA 15.13-24
- 2♣ & 2♦ 16.01-12
- Réveil 16.13-24
- Les interventions 17.01-12
- Les interventions 17.13-24
- Tournoi pour tous 18.01-24
- Atouts de la défense*
- Défense contre le Michæl's — 21.13-24
Avertissement
Apprenez à jouer au bridge si vous n'avez jamais joué. Ces leçons pour débutants sont conçues pour ceux qui connaissent peu ou pas le jeu. Vous pouvez également accéder à des vidéo — sans publicité.
Avertissement
Apprenez à jouer au bridge si vous n'avez jamais joué. Ces leçons pour débutants sont conçues pour ceux qui connaissent peu ou pas le jeu. Vous pouvez également accéder à des vidéo — sans publicité.
Notes
Notes
Défausser ou couper?
Notes
Chargée?
Notes
Notes
Notes
Notes
Notes

Notes
• Carte maîtresse
• Visualisation et repérage
• Prévision des levées
Notes
• Carte maîtresse
• Visualisation et repérage
• Prévision des levées
Notes
| Nord ♠ A R V 10 ♥ 9 7 5 3 ♦ R ♣ 7 5 3 2 |
||
| Ouest ♠ 8 7 ♥ 2 ♦ A V 8 6 4 3 ♣ A D 10 8 |
Est ♠ D 9 3 2 ♥ D ♦ D 10 9 7 5 2 ♣ V 9 | |
| Sud ♠ 6 5 4 ♥ A R V 10 8 6 4 ♦ — ♣ R 6 4 |
Notes
| Nord ♠ 2 ♥ V 8 5 2 ♦ D 8 4 ♣ 10 6 3 2 |
||
| Ouest ♠ A ♥ 10 9 6 4 ♦ 10 9 7 5 2 ♣ A R D |
Est ♠ R D 8 7 ♥ D 7 3 ♦ V 6 3 ♣ V 9 8 | |
| Sud ♠ V 10 9 6 5 4 3 ♥ A R ♦ A R ♣ 7 5 |
Notes
| Nord ♠ 8 6 3 ♥ D 8 5 ♦ R 8 6 4 ♣ A 7 3 |
||
| Ouest ♠ A R D 9 4 ♥ 6 ♦ 10 9 2 ♣ V 9 6 5 |
Est ♠ V 10 2 ♥ V 10 9 7 3 2 ♦ 3 ♣ 10 8 4 | |
| Sud ♠ 7 5 ♥ A R 4 ♦ A D V 7 5 ♣ R D 2 |
Notes
| SUD | OUEST | NORD | EST |
|---|---|---|---|
| 1 ♥ | Passe | 2 ♥ | Passe |
| 4 ♥ | Passe | Passe | Passe |
| NORD ♠ A 4 3 ♥ 10 3 2 ♦ 8 7 4 2 ♣ A 8 2 |
||
| OUEST ♠ 9 7 5 2 ♥ V ♦ D 9 3 ♣ D V 10 6 3 |
EST ♠ 10 6 ♥ D 9 7 6 ♦ R V 10 ♣ R 9 7 4 | |
| SUD ♠ R D V 8 ♥ A R 8 5 4 ♦ A 6 5 ♣ 5 |
Ouest entame la ♣ Dame
| Paliers | ♦/ ♣ | ♥/ ♠ | Sans Atout |
|---|---|---|---|
| Partielles | 28,9 % | 49,9 % | 21,2 % |
| Manches | 9,1 % | 55,1 % | 35,8 % |
| Petits chelems | 38 % | 52,3 % | 9,7% |
| Grands chelems | 36,2 % | 51,3 % | 12,4 % |
| Total | 18,4 % | 53 % | 28,6 % |
Niveau de difficulté 2 neurones
Notes
• Mécanisme des enchères à quatre
• Jouer à Sans-Atout après l’ouverture du camp adverse
• Jouer à la couleur après une intervention à 1SA
• Premiers éléments de signalisation
• Ouverture en majeure et compte des atouts
• Coupes de la main courte
• L’intervention à 1♠
• Enchères de soutien
• La double impasse
| Vert | 1 | 2 | 3 | 4 | 5 | 6 | 7 |
|---|---|---|---|---|---|---|---|
| ♠/ ♥ | 80 | 110 | 140 | 420 | 450 | 980 | 1510 |
| SA | 90 | 120 | 400 | 430 | 460 | 990 | 1520 |
| ♦/ ♣ | 70 | 90 | 110 | 130 | 420 | 920 | 1440 |
| Rouge | 1 | 2 | 3 | 4 | 5 | 6 | 7 |
|---|---|---|---|---|---|---|---|
| ♠/ ♥ | 80 | 110 | 140 | 620 | 650 | 1430 | 2210 |
| SA | 90 | 120 | 600 | 630 | 660 | 1440 | 2220 |
| ♦/ ♣ | 70 | 90 | 110 | 130 | 600 | 1370 | 2140 |
Notes
Observez que si 10% des manches sont jouées dans une couleur mineure c'est 40% des chelems...À qui la faute? Lorsque l'on a du jeu annoncez en réponse votre couleur longue!
| Paliers | ♦/ ♣ | ♥/ ♠ | Sans Atout |
|---|---|---|---|
| Partielles | 28,9 % | 49,9 % | 21,2 % |
| Manches | 9,1 % | 55,1 % | 35,8 % |
| Petits chelems | 38 % | 52,3 % | 9,7% |
| Grands chelems | 36,2 % | 51,3 % | 12,4 % |
| Total | 18,4 % | 53 % | 28,6 % |
Notes
| Paliers | ♦/ ♣ | ♥/ ♠ | Sans Atout |
|---|---|---|---|
| Partielles | 28,9 % | 49,9 % | 21,2 % |
| Manches | 9,1 % | 55,1 % | 35,8 % |
| Petits chelems | 38 % | 52,3 % | 9,7% |
| Grands chelems | 36,2 % | 51,3 % | 12,4 % |
| Total | 18,4 % | 53 % | 28,6 % |
Notes


Notes
Notes
Notes
Notes
Notes
À la carte songez à produire des coupes de la main courte à l'atout, elles rapportent des plis autrement inespérés. Quant aux impasses, elle vous permettront d'emporter des levées avec des cartes non maîtresses? Ce thème est très vaste, nous aurons l'occasion de revenir dessus.
L'ouverture de 2♣ est artificielle. Elle sert à montrer des jeux puissants.
Notes
Notes
À côté, quelle carte fournir en défense lorsque le déclarant manœuvre une couleur? En général vous aurez intérêt à fournir une basse carte en second, surtout si un honneur du mort peut être capturé par votre partenaire. Comme toujours, il y a d'autres situations : fournir en second lorsqu'une carte du mort es appelée.
Notes
Pour intervenir au palier de Un une bonne couleur de cinq cartes — indication d'entame, ou bien encore avec une main irrégulière. Dans ces deux cas il n'est pas nécessaire d'avoir une valeur d'ouverture. On interviendra également avec une couleur cinquième et une valeur d'ouverture.
L'intervention par 1SA doit satisfaire d'autres critères.
Notes
Notes
Illustration: si donc vous détenez 7 points et une couleur présentable de 7 cartes, les trois autres se partageront les 33 points dehors et 6 cartes dans votre couleur. En moyenne votre camp partagera les points (7 + 33/3 = 18 H.) et détiendra neuf atouts (7 + 6/3 = 9). Le garde-fous est la vulnérabilité, n'attendez pas pour bondir au palier des Trois...
Notes
La seconde enchère du répondant ou rebid n'est pas toujours évidente: main limité, forte avec de mauvais Piques, etc.
Notes
La seconde enchère du répondant ou rebid n'est pas toujours évidente non plus: main limitée, forte avec de mauvais Piques, etc. Il existe cependant des conventions.
Notes
Notes
La promotion d'atout est une manœuvre désespérée de la défense. Regardez la vidéo.
Notes
La promotion d'atout est une manœuvre désespérée de la défense. Regardez la vidéo.
Notes
Notes
Notes
Notes
Notes
Notes
Notes
| LE MORT ♦ A D 2 |
||
| DÉCLARANT ♦ 4 3 |
c'est zéro chance...
Notes
Notes
Notes
Notes
Le Contre est une déclaration — on peut contrer plusieurs fois tandis qu'une enchère ne peut être produite qu'une seule fois. Son objet est d'augmenter la marque mais à bas palier il est plus intéressant d'en faire un appel pour jouer dans l'une des autres couleurs que la couleur d'ouverture adverse. Pour cela il faut être avoir trois cartes dans les autres couleurs, être court dans la couleur adverse et avoir la valeur d'une ouverture — voire beaucoup plus. Le Contre d'appel permet de se manifester lorsque l'on n'a aucune enchère naturelle à sa disposition.
Notes
Notes
Notes
Notes
Notes
Notes
Notes
Notes
Notes
Notes
Notes
Notes
Notes
Notes
Notes
Mauvais chelem: au mieux à 50%
Notes
Notes
Il n'en demeure pas moins qu'il est nécessaire de préciser les critères d'intervention sur ces ouvertures au palier de 3 et 4.
La signification du contre et la réaction face à ce contre font l'objet d'un grand nombre d'accidents dans tous les clubs, tous les jours.
Les enchères d'ouverture préventives et les enchères faibles de l'ennemi rendent difficile pour vous et votre partenaire d'atteindre le meilleur contrat. Si vous passez, vous pourriez manquer un bon contrat à jouer, et si vous enchérissez, vous pourriez être débordé. Il n'y a pas de défense parfaite ; s'il y en avait une, les joueurs cesseraient de faire des enchères faibles. Faut-il payer un barrage?
Notes
Notes
Une main bicolore au moins 5-4 dans les majeures
La valeur minimum est d'en général d'une dizaine de points mais la main s'évalue principalement en perdantes. En réveil c'est la vulnérabilité qui sera le garde-fous. La force sera parfois moindre si le bicolore est 5-5 et la vulnérabilité favorable. On compte en général 7 perdantes maximum pour un bicolore 5-5 et 6 pour un bicolore 5-4 si la vulnérabilité est favorable. Rappelez vous : dans les interventions bicolores la localisation des honneurs dans les couleurs longues est plus importantes que le nombre de points. Le Sans-atout ne fait plus peur!
Notes
Notes
Notes
La main dangereuse, à la couleur ou à SA
Notes
Entame sincère ou fausse entame?
Notes
1ère école : l’annonce de 1♠ montre au moins quatre Piques et le Contre est un Spoutnik qui dénie quatre Piques.
2ème école : Le Contre montre exactement quatre Piques et l’annonce de 1♠ promet au moins cinq Piques (convention dite de “la collante”).
Le Cachalot est une convention proche de la 1re école consistant à inverser la signification du Contre et de l’enchère de 1♠. Cette convention est très facile à utiliser et présente de tels avantages que les deux écoles précédemment évoquées sont déjà appelées à passer aux oubliettes. Notons enfin qu’il est possible de jouer le Cachalot au palier de deux ou après un contre d’appel mais ces variantes nous paraissent moins pertinentes.
Two over One game force??
Notes
Se défendre contre un barrage
Notes
Se défendre contre un barrage
Notes
Notes
Notes
Nous nous intéresserons ici à un problème crucial, celui d’empêcher l’adversaire d’encaisser trop de levées avant que vous meniez à bien l’établissement des vôtres. C’est le problème du temps, bien connu à Sans-Atout sous le nom de course de vitesse. Avec ce thème, nous détaillerons le raisonnement en ce sens dans les contrats à l’atout.
Rendre ou pas la mainNotes
Après une ouverture majeure et une intervention naturelle, l’enchère de 2SA promet — un fit de 3 cartes dans la couleur majeure d’ouverture. Une main d’au moins 11-12 HLD (et au maximum 15 HLD). Attention, après intervention on l’emploie donc aussi avec des mains qui vont ensuite imposer la manche ! (On rappelle que le cue-bid promet en théorie 4 atouts). En situation compétitive
Notes
Notes
Abonnez-vous!
Abonnez-vous à nos meilleurs donnes jouées.
start something that matters
Rejoignez le groupe des bridgeurs très talentueux du club de bridge de Saint-Cloud.
À venirJean-Pierre.
0 788 319 885
Code promo perpétuel.
3 SA*J'espère que ce site vous aidera à faire des progres mais il ne faudrait pas que cela devienne une habitude contre moi.
*Autorisation de © Richard Pavlicek pour ceratins thème liés aux compétitions. Des donnes sont inspirées par des travaux de © l'UB — F.F.B.
*Vous trouverez quelques propositions publiées par mon partenaire et moi-même dans la revue The Bridge World.
— Suis chez Oracle, Inc. lorsque je me repose.